How To Make Sur Ewarning Lights Are Working
Breaking News Today
Mar 20, 2025 · 6 min read
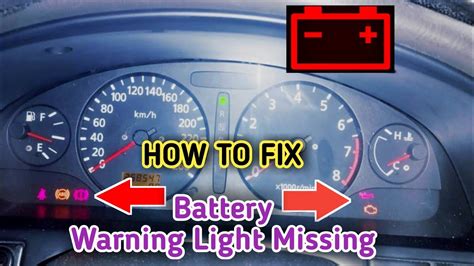
Table of Contents
How to Make Sure Your Warning Lights Are Working: A Comprehensive Guide
Staying safe on the road depends heavily on your vehicle's ability to signal potential problems. Warning lights, often overlooked until they illuminate, are your car's crucial communication system. Understanding what each light means and ensuring they function correctly is vital for preventing accidents and costly repairs. This comprehensive guide will walk you through how to check your vehicle's warning lights, decipher their meanings, and what steps to take if you encounter a malfunction.
Understanding Your Vehicle's Warning Lights
Before diving into how to test your warning lights, it's crucial to understand what they represent. Warning lights vary slightly depending on the make and model of your vehicle, but many are standardized. Refer to your owner's manual for a definitive guide to your specific car's indicators. Common warning lights include:
Engine Warning Light (Check Engine Light):
This is arguably the most important warning light. It illuminates when the vehicle's onboard diagnostic system (OBD-II) detects a problem with the engine or emission control system. This could range from a minor issue like a loose gas cap to a serious problem requiring immediate attention. Ignoring this light is risky and can lead to significant engine damage.
Brake Warning Light:
This light indicates a problem with your braking system. It could signal low brake fluid, a malfunctioning brake system component, or a problem with the parking brake. Driving with a lit brake warning light is extremely dangerous and should be avoided.
Battery Warning Light:
This light signifies a problem with your vehicle's charging system, often indicating a malfunctioning alternator or a failing battery. Continuing to drive with this light on can lead to a dead battery, leaving you stranded.
Oil Pressure Warning Light:
This is a critical warning light that indicates insufficient oil pressure in your engine. Driving with low oil pressure can cause catastrophic engine damage in a very short time. If this light comes on, pull over immediately and turn off the engine.
Temperature Warning Light (Overheating):
This light illuminates when your engine is overheating. Overheating can cause serious damage to your engine. Pull over safely and allow the engine to cool before attempting to diagnose the problem.
Airbag Warning Light:
This light indicates a problem with your airbag system. A malfunctioning airbag system could compromise your safety in an accident.
Tire Pressure Monitoring System (TPMS) Warning Light:
This light illuminates when one or more of your tires have low air pressure. Driving with underinflated tires can affect handling, fuel efficiency, and tire lifespan.
Other Warning Lights:
Many other warning lights exist, such as those indicating problems with the anti-lock braking system (ABS), traction control, electronic stability control (ESC), and various other systems. Consult your owner's manual for a complete explanation of your vehicle's warning lights.
Testing Your Warning Lights: A Step-by-Step Guide
Testing your warning lights is a simple process that can provide significant peace of mind. Here's how to do it:
1. Start the Vehicle:
Turn the ignition key to the "ON" position (without starting the engine). This activates the self-diagnostic system, illuminating all the warning lights on the dashboard.
2. Observe the Lights:
All warning lights, except the check engine light, should illuminate briefly. If any lights fail to illuminate, it indicates a possible problem with the bulb or the system it represents. The check engine light might stay on for a moment longer and then go off or remain illuminated depending on the vehicle's computer system.
3. Start the Engine:
After a few seconds, start the engine. Most warning lights should turn off once the engine is running. If any lights remain illuminated, it indicates a potential issue requiring further investigation.
4. Check for Intermittent Lights:
Some warning lights might only illuminate intermittently. This could still signify a potential problem that should be addressed. Note the conditions under which these lights appear (e.g., high speed, low engine speed, specific turns).
Addressing Malfunctioning Warning Lights
If a warning light remains on or illuminates intermittently, it's crucial to address the issue promptly. Here's a breakdown of how to proceed:
1. Consult Your Owner's Manual:
Your owner's manual provides detailed information on the meaning of each warning light and possible causes. This is your first and most reliable resource.
2. Perform Basic Checks:
Depending on the warning light, you might be able to perform some basic checks yourself. For example, check your tire pressure if the TPMS light is on, or check your brake fluid level if the brake warning light is illuminated.
3. OBD-II Scanner:
For engine-related issues indicated by the check engine light, an OBD-II scanner can retrieve diagnostic trouble codes (DTCs) that provide more specific information about the problem. While you can purchase your own scanner, an auto parts store can often scan your vehicle for free.
4. Professional Diagnosis:
If you are unable to identify the problem or the issue persists after attempting basic checks and using an OBD-II scanner, it's best to take your vehicle to a qualified mechanic for professional diagnosis and repair. Ignoring warning lights can lead to expensive repairs down the road.
Preventing Warning Light Issues
Regular maintenance can significantly reduce the risk of warning lights illuminating. Here are some key preventative measures:
1. Routine Maintenance:
Schedule regular maintenance appointments as recommended in your owner's manual. This includes oil changes, fluid checks, tire rotations, and other vital services.
2. Fluid Checks:
Regularly check your vehicle's fluids, including engine oil, brake fluid, coolant, and power steering fluid. Maintaining proper fluid levels is essential for the health of your vehicle.
3. Tire Pressure:
Check your tire pressure regularly and inflate them to the recommended pressure listed in your owner's manual or on the tire sidewall.
4. Battery Maintenance:
Ensure your battery terminals are clean and corrosion-free. Have your battery tested periodically to assess its health.
5. Regular Inspections:
Periodically inspect your vehicle's various systems for any signs of wear or damage. Early detection can help prevent more serious problems later on.
The Importance of Prompt Attention
Ignoring warning lights can have serious consequences, ranging from minor inconveniences to catastrophic engine failure. The cost of repairing a problem early is significantly less than the cost of repairing the damage caused by neglecting the warning signs. Taking proactive steps to understand your vehicle’s warning lights, testing them regularly, and addressing any issues promptly can help ensure your safety and the longevity of your vehicle. Remember, a few minutes of preventative maintenance can save you hours (and thousands of dollars) of costly repairs down the line. Your safety and your vehicle's wellbeing depend on it. Don't delay; check your warning lights today!
Latest Posts
Latest Posts
-
Mrs Duarte Is Enrolled In Original Medicare
Mar 20, 2025
-
As An Rbt You Should Expect To See Your Supervisor
Mar 20, 2025
-
Dod Mandatory Controlled Unclassified Information Training Answers
Mar 20, 2025
-
The Three Primary Goals Of Duct Design Are
Mar 20, 2025
-
Doubt Is To Suspicion As Confidence Is To
Mar 20, 2025
Related Post
Thank you for visiting our website which covers about How To Make Sur Ewarning Lights Are Working . We hope the information provided has been useful to you. Feel free to contact us if you have any questions or need further assistance. See you next time and don't miss to bookmark.
